Imagine a technician tasked with inspecting the interior of a turbine blade, a corroded pipe buried behind a wall, or a hairline crack inside an engine block. These hard-to-reach areas represent some of the most common challenges in industrial maintenance—where visual confirmation is critical but physical access is nearly impossible without disassembly. Costly downtime, missed defects, and safety risks compound when the right diagnostic tools aren’t available. Borescope inspection cameras have become essential instruments for technicians who need to see inside confined spaces without tearing equipment apart.
This guide provides a comprehensive framework for evaluating borescope inspection cameras based on the criteria that matter most in the field. We’ll examine technical specifications that determine image quality and probe versatility, video recording features for documentation and analysis, and display characteristics—including the advantages of a 7-inch screen—that affect real-time decision-making. Along the way, we’ll reference practical examples like the Teslong NTS700 to illustrate how these criteria translate into real-world performance. Whether you’re replacing an aging unit or purchasing your first inspection camera, making an informed choice ensures your tool meets your specific application demands without exceeding your budget.
Understanding Technical Specifications of Inspection Cameras
Technical specifications form the foundation of any borescope evaluation because they determine whether the camera can physically access your target area and deliver images clear enough to identify defects. A camera that looks impressive on paper but lacks the right probe diameter for your application is essentially useless in the field. Understanding these specifications isn’t just about comparing numbers—it’s about matching capabilities to the specific demands of your inspection environment, whether that’s a narrow hydraulic line, a high-temperature exhaust system, or a moisture-prone plumbing cavity.
Core Technical Specs Explained
Camera resolution directly governs your ability to identify fine cracks, pitting, corrosion, and other surface anomalies. HD resolution (720p or higher) is now considered the minimum standard for professional use, with many units offering sensors in the range of 2 to 5 megapixels. Higher pixel counts capture finer detail, but sensor quality and lens optics matter equally—a well-engineered 2MP sensor can outperform a poorly designed 5MP one in low-light conditions.
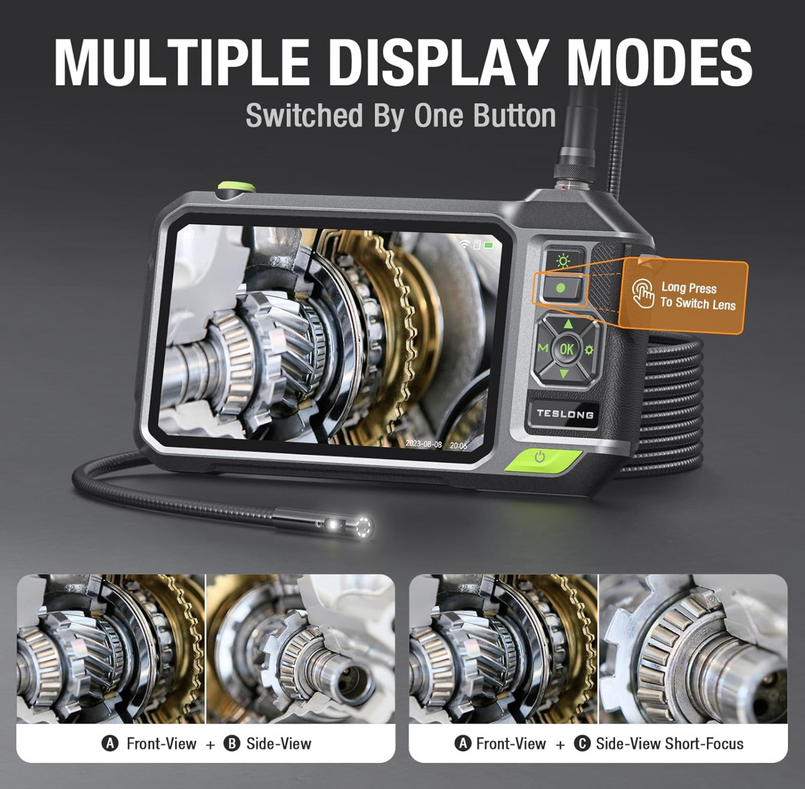
Probe attributes deserve careful attention. Diameter determines access capability: a 5.5mm probe fits into spark plug holes and small-bore tubing, while an 8.5mm probe offers better image quality and durability for larger cavities. Probe length must match your reach requirements, with options typically ranging from one to five meters. Flexibility and semi-rigid construction affect maneuverability around bends, and some models feature mechanical articulation at the tip—allowing 180° or even 360° steering for precise navigation through complex geometries. Durability ratings such as waterproof certification (IP67 or higher) indicate whether the probe can withstand submersion in oil, water, or chemical environments.
Illumination is critical since inspection targets exist in complete darkness. Adjustable LED lighting built into the probe tip allows technicians to control brightness levels, preventing overexposure on reflective metal surfaces while providing sufficient light in deep cavities. The number of LEDs, their placement around the lens, and dimming range all influence how evenly the target area is illuminated.
How to Interpret Spec Sheets for Informed Decisions
When comparing spec sheets across brands, focus first on the specifications that align with your most demanding application rather than chasing the highest numbers across every category. A common pitfall is prioritizing resolution while overlooking probe diameter compatibility—the sharpest image means nothing if the camera physically cannot reach the inspection point. Another frequent mistake is ignoring depth of field specifications; a camera optimized for close-up surface inspection (10–30mm focal distance) will produce blurry images when viewing larger chambers at greater distances. Always verify whether stated resolutions refer to the sensor capability or the actual recorded output, as these sometimes differ. Cross-reference articulation angles with your typical inspection geometry, and confirm that advertised probe lengths account for the usable insertion length rather than total cable length including the connector. Reading user reviews from professionals in your specific industry often reveals real-world performance gaps that spec sheets cannot capture.
Evaluating Video Recording Capabilities for Accurate Inspections
Documentation transforms a one-time visual inspection into a permanent record that can be reviewed, shared, and compared over time. Video recording capabilities separate professional-grade borescopes from basic viewing tools, enabling technicians to capture evidence of defects for maintenance reports, warranty claims, regulatory compliance, and trend analysis. When a crack is discovered inside a heat exchanger tube, having recorded footage allows engineers to assess severity without sending another technician back into the field. The quality of that recording—and how easily it can be stored, retrieved, and shared—directly impacts the value of the inspection itself.
Video Resolution and Quality Factors
Video resolution determines how much detail is preserved when footage is played back on a computer or shared with a remote engineering team. A camera recording at 1080p captures significantly more surface detail than one limited to VGA output, making it easier to distinguish between a superficial stain and an actual pit or crack during post-inspection analysis. Frame rate matters as well—30 frames per second provides smooth playback for standard inspections, while higher frame rates can be useful when the probe is moving quickly through a passage, reducing motion blur and allowing frame-by-frame review of suspect areas. Some units also offer snapshot capability during recording, letting technicians flag specific moments without interrupting the video. Audio recording, though less commonly discussed, adds value when technicians narrate findings in real time, creating a verbal log that accompanies the visual evidence. The combination of sharp resolution and adequate frame rate ensures that what you see live on the display is faithfully captured for later review.
Storage Options and File Management
Storage architecture varies considerably across borescope models. Some units rely on built-in internal memory, which simplifies operation but limits total recording time. Others use removable SD cards or micro SD cards, offering expandable storage and easy file transfer to computers or cloud systems. A 32GB card typically holds several hours of HD video—more than sufficient for most inspection sessions—but technicians performing lengthy surveys should verify maximum supported card capacity before purchasing. File format compatibility is another practical consideration; cameras that save in widely supported formats like MP4 or AVI eliminate the need for proprietary software during playback. For efficient report generation, look for models that automatically timestamp recordings and allow folder organization by date or job. The ability to connect via USB or WiFi for direct file transfer streamlines workflows, particularly in environments where inspection reports must be submitted the same day. Establishing a consistent naming convention and backup routine prevents the loss of critical footage that may be needed months later during failure investigations.
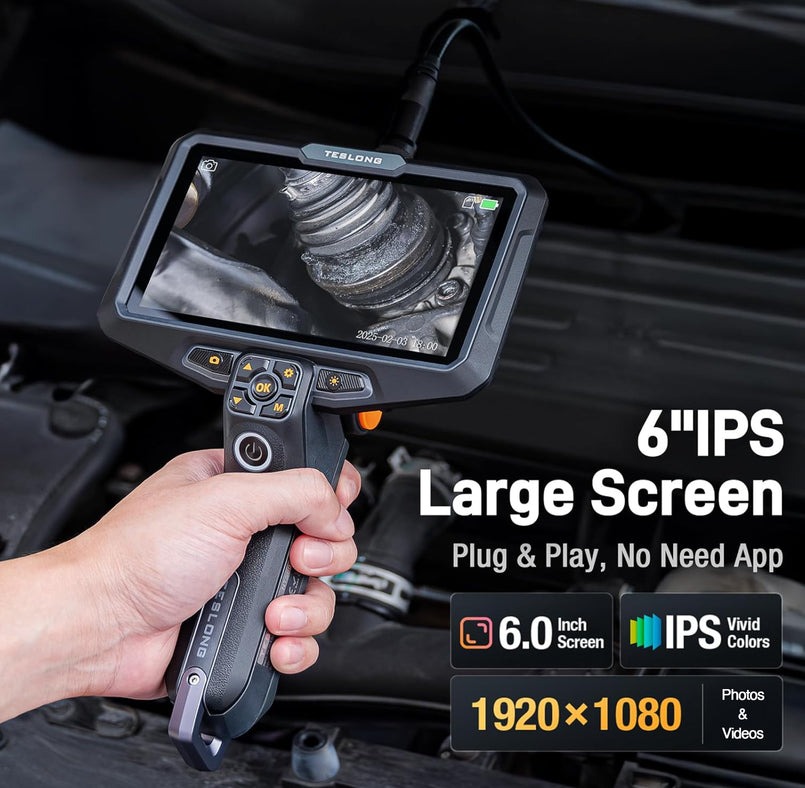
The Advantage of a 7-inch Screen in Borescope Cameras
The display is your window into the inspection environment, and its size directly affects how quickly and accurately you can identify defects during live viewing. A 7-inch screen in a borescope camera strikes a balance between portability and visual clarity that smaller displays simply cannot match. When you’re navigating a probe through a complex passage, every millimeter of screen real estate helps you distinguish between shadow artifacts and actual surface damage. Larger displays also facilitate team collaboration—multiple technicians can view the feed simultaneously without crowding around a tiny monitor, enabling real-time discussion about findings and immediate decision-making on repair priorities.
Comparing Screen Sizes: 7-inch vs. Smaller Displays
Borescopes with 3.5-inch or 4.3-inch screens force technicians to squint at fine details, particularly when inspecting surfaces with subtle discoloration or micro-cracks. A 7-inch screen displays roughly three to four times more viewable area than a 3.5-inch panel, making it significantly easier to spot hairline fractures in weld joints or early-stage corrosion pitting inside boiler tubes. In field settings where ambient light washes out smaller screens, the larger display maintains readability without requiring technicians to cup their hands around the unit or retreat to darker areas. During automotive engine inspections, for example, the difference between identifying carbon buildup and an actual valve seat crack often comes down to whether the display renders enough pixel detail at a comfortable viewing distance. When footage needs to be reviewed on-site with a supervisor or client before proceeding with repairs, a 7-inch screen eliminates the need to transfer files to a laptop for adequate viewing.
Ergonomics and Visibility Considerations
Screen size influences not only image clarity but also how long a technician can work comfortably before fatigue sets in. Prolonged squinting at undersized displays causes eye strain and headaches, reducing inspection accuracy over multi-hour sessions. A 7-inch screen allows viewing at a natural arm’s length, maintaining a comfortable posture whether you’re standing at a workbench or crouching beside heavy machinery. When choosing based on your inspection environment, consider mounting options—some larger-screen units include stands or magnetic mounts that free both hands for probe manipulation. If your work involves confined spaces where carrying a larger unit becomes cumbersome, verify the device’s weight and grip design. Most 7-inch models remain under two pounds, keeping them manageable even during overhead inspections. The key is matching screen size to your typical working distance and session duration, ensuring that the display enhances rather than hinders your workflow.
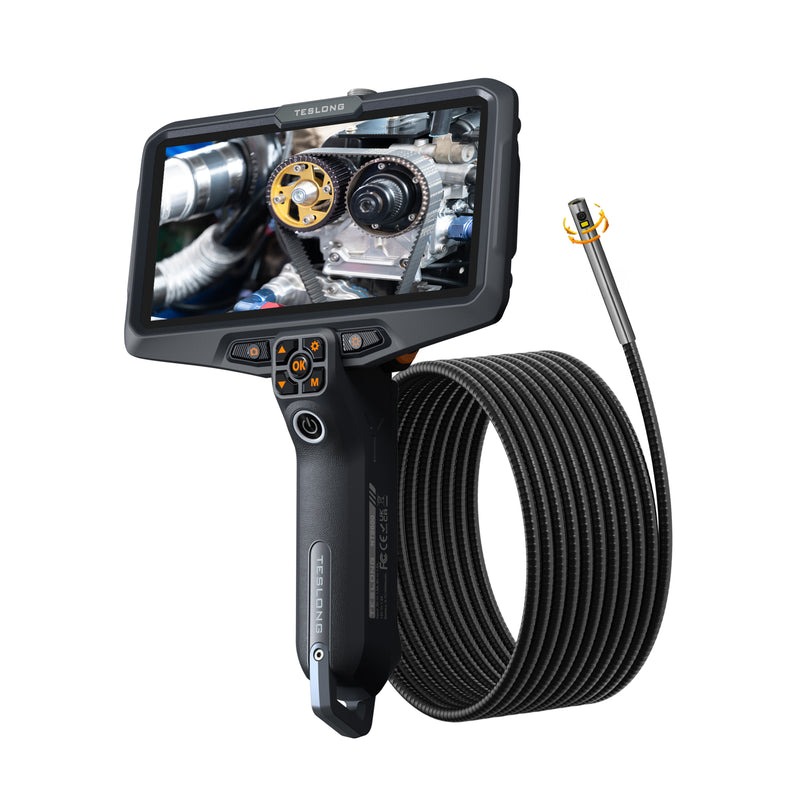
A Closer Look at the NTS700 Inspection Camera
Applying evaluation criteria to a specific model helps illustrate how specifications translate into practical capability. The Teslong NTS700 serves as a useful case study because it addresses several common technician requirements within a single unit, demonstrating the kind of feature balance that professionals should look for when comparing options. Examining its strengths and limitations provides a concrete reference point for the evaluation framework discussed throughout this guide.
Key Features and Technical Specs of NTS700
The NTS700 pairs a 7-inch screen with HD camera resolution, delivering the combination of display clarity and image detail that field technicians need for confident defect identification. Its probe offers sufficient flexibility for navigating curved passages found in automotive engines, HVAC systems, and industrial piping, while built-in adjustable LED illumination handles the complete darkness inside these environments. Video recording captures inspection footage directly to removable storage media, enabling immediate file transfer and report generation without proprietary software. The unit supports snapshot capture during live viewing, allowing technicians to flag defects without interrupting a continuous video record. Its construction reflects the demands of shop and field environments, with controls designed for gloved operation and a form factor that remains manageable during extended inspection sessions.
Performance in Real-World Scenarios
In automotive applications, technicians report that the NTS700’s display size makes carbon deposit assessment and cylinder wall inspection noticeably faster compared to smaller-screen alternatives—reducing the back-and-forth of repositioning the probe to confirm what they’re seeing. Plumbing and HVAC professionals find the video recording function valuable for documenting blockages or corrosion evidence that justifies repair recommendations to clients. The unit’s affordability positions it as a practical entry point for independent mechanics and small maintenance teams who need reliable documentation capability without the investment required for premium articulating models. Users consistently note the balance between image quality and cost-effectiveness as its primary strength, while acknowledging that technicians requiring mechanical tip articulation for complex aerospace geometries may need to look at higher-tier options. For the majority of general maintenance and diagnostic inspections, the NTS700 demonstrates that meeting core evaluation criteria—adequate resolution, usable probe design, quality recording, and a generously sized display—delivers dependable performance without budget strain.
Step-by-Step Guide to Choosing Your Borescope Inspection Camera
Moving from understanding specifications to actually selecting a camera requires a structured approach that prevents impulse purchases and buyer’s remorse. Many technicians default to either the cheapest available option or the most feature-packed model, when the right choice almost always falls somewhere between those extremes. A methodical evaluation process ensures you invest in a tool that performs reliably for your specific applications while respecting budget constraints.
Defining Your Inspection Requirements
Start by documenting the physical characteristics of your most common inspection targets. What is the smallest opening the probe must fit through? How far must it reach? Will it encounter oil, water, or chemical exposure? Next, consider the defects you’re trying to identify—hairline cracks demand higher resolution than locating a loose fitting or general blockage. Ask yourself how often you’ll use the camera: daily professional use justifies a more durable investment, while occasional diagnostic checks may not require top-tier construction. Think about your documentation needs as well. If inspection reports with video evidence are mandatory for compliance or client communication, video recording quality and storage management become non-negotiable priorities. Finally, consider your working environment—outdoor inspections in bright sunlight demand a high-brightness display, while confined space work prioritizes compact form factor and hands-free mounting options. Matching technical specs to these real-world task requirements eliminates features you’ll never use and ensures you don’t overlook capabilities you genuinely need.
Balancing Budget and Quality for Affordable Solutions
Affordable doesn’t mean inadequate—it means allocating your budget toward the features that directly impact your work quality. Identify which specifications are essential versus merely desirable for your applications. A technician inspecting residential plumbing rarely needs mechanical articulation, so redirecting that cost toward better video recording and a larger display delivers more practical value. Look for models that excel at core functions rather than units that offer every feature at mediocre quality levels. Reading reviews from professionals in your specific trade reveals whether a camera’s real-world durability matches its marketed claims. Consider total cost of ownership, including replacement probes, accessories, and warranty coverage. Units like the NTS700 demonstrate that cameras combining HD resolution, reliable video recording, and a 7-inch screen can remain accessible to independent technicians and small teams without sacrificing the performance needed for confident inspections.
Final Decision-Making Checklist
Before committing to a purchase, verify these critical points: probe diameter fits your smallest access point, probe length reaches your deepest inspection target, camera resolution meets your defect detection requirements, video recording saves in universally compatible formats, storage capacity covers your typical session length, display size supports comfortable extended viewing, illumination adjusts sufficiently for your target surfaces, and construction durability matches your working conditions. Compare at least three models side by side using these criteria, weighting each factor according to your prioritized requirements. Seek hands-on demonstrations or detailed video reviews showing the camera performing inspections similar to yours. Confirm return policies and warranty terms before finalizing your decision, and verify that accessories like replacement probes and carrying cases are readily available for your chosen model.
Matching the Right Borescope to Your Inspection Workflow
Selecting the right borescope inspection camera comes down to aligning tool capabilities with the realities of your work. Technical specifications—resolution, probe dimensions, articulation, and illumination—determine whether the camera can physically access your inspection targets and render defects with enough clarity for confident diagnosis. Video recording capabilities transform fleeting observations into permanent documentation that supports compliance reporting, client communication, and long-term trend analysis. A 7-inch screen delivers the viewing area needed for accurate real-time assessment without the eye strain and second-guessing that plague smaller displays, while also enabling collaborative on-site decision-making.
The NTS700 illustrates how these evaluation criteria come together in a practical, accessible package—proving that reliable performance doesn’t require an unlimited budget. By following a structured selection process that starts with defining your specific inspection requirements, prioritizing the features that directly impact your work quality, and systematically comparing models against a weighted checklist, you avoid both overspending on unnecessary capabilities and underinvesting in tools that fail when it matters most. Apply this framework consistently, and you’ll invest in a borescope that earns its place in your toolkit through years of dependable service across the inspections that define your trade.