The demand for non-invasive skin treatments has surged dramatically, with microneedling standing at the forefront of this movement. Clients increasingly seek procedures that deliver visible results without extended downtime, and practitioners are responding by refining their techniques and tools. At the heart of effective microneedling lies a component that often determines the difference between mediocre and exceptional outcomes: the PMU cartridge. These precision-engineered tools serve as the direct interface between practitioner expertise and client skin, yet many aesthetic professionals find themselves navigating a confusing landscape of cartridge options, quality variations, and application techniques. Selecting the wrong cartridge or applying it improperly can compromise treatment results, reduce client confidence, and even pose safety risks. This guide addresses these challenges head-on, offering practitioners a comprehensive resource for understanding, selecting, and using PMU cartridges to achieve consistent, superior skin rejuvenation. From quality benchmarks like ISO certification to step-by-step procedural techniques, the following sections equip you with everything needed to elevate your microneedling practice.
What Are PMU Cartridges? Essential Tools for Modern Microneedling
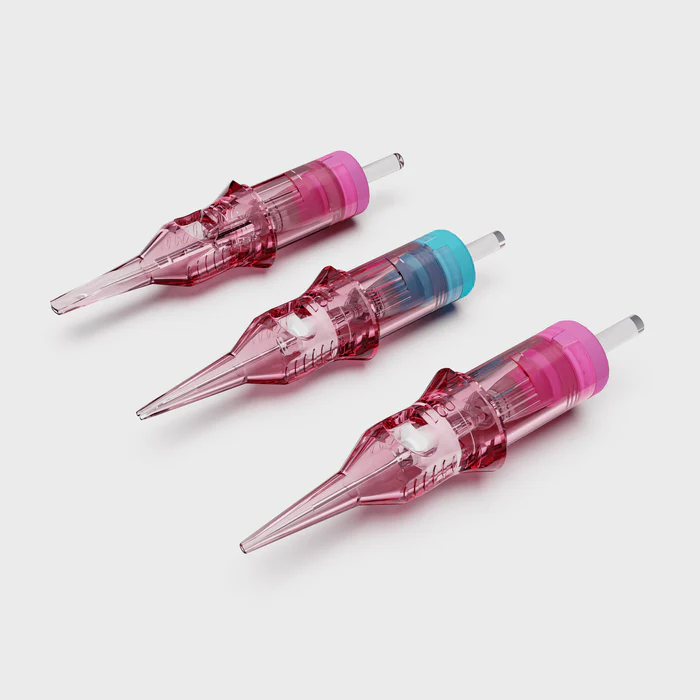
PMU cartridges are precision-engineered needle modules originally developed for permanent makeup applications and now widely adopted in professional microneedling treatments. Each cartridge houses a cluster of fine-gauge needles arranged in specific configurations—round, flat, or nano—secured within a medical-grade plastic housing that connects seamlessly to compatible pen-style devices. Unlike general microneedling rollers or basic derma stamp cartridges, PMU cartridges feature built-in safety membranes that prevent fluid backflow into the device, protecting both the machine and the client from cross-contamination. Their needle groupings are manufactured with tighter tolerances, meaning each needle tip maintains uniform length and taper, which translates directly into more controlled skin penetration and reduced tissue trauma. The evolution of these cartridges reflects broader advances in aesthetic technology. Early microneedling relied on manual rollers with fixed needle depths and inconsistent puncture angles. Modern PMU cartridges emerged as the industry demanded adjustable depth control, single-use sterility, and compatibility with motorized devices capable of delivering thousands of precise punctures per minute. For aesthetic practitioners, this means access to a tool that bridges the gap between invasive procedures and topical treatments, offering measurable results through controlled micro-injuries that activate the skin’s natural healing cascade.

The Role of PMU Cartridges in Advanced Skin Rejuvenation
PMU cartridges drive skin rejuvenation through a precisely orchestrated wound-healing response. When needles penetrate the epidermis and upper dermis at controlled depths, they create thousands of micro-channels that trigger the body’s inflammatory cascade—releasing growth factors, stimulating fibroblast activity, and ultimately producing fresh collagen and elastin fibers. This neocollagenesis process gradually remodels scarred, aged, or damaged tissue from within, delivering improvements that topical products alone cannot achieve. Beyond structural remodeling, these micro-channels serve as temporary pathways for enhanced serum absorption. Active ingredients like hyaluronic acid, vitamin C, and peptide complexes penetrate up to 80% deeper when applied immediately after needling, amplifying their therapeutic effects on hyperpigmentation, fine lines, and textural irregularities. The precision of PMU cartridge needle configurations allows practitioners to target specific concerns with remarkable accuracy—tighter groupings for concentrated scar work, wider formations for broad-surface rejuvenation across the cheeks or forehead. For clients, the visible transformation in skin tone, firmness, and smoothness builds trust and encourages treatment continuity. For practitioners, consistent skin rejuvenation outcomes translate into stronger reputations, higher retention rates, and the ability to offer tiered treatment protocols that address everything from early aging signs to deep acne scarring with a single versatile tool system.
Selecting Quality PMU Cartridges: Focusing on ISO-Certified Needles and Stable Performance
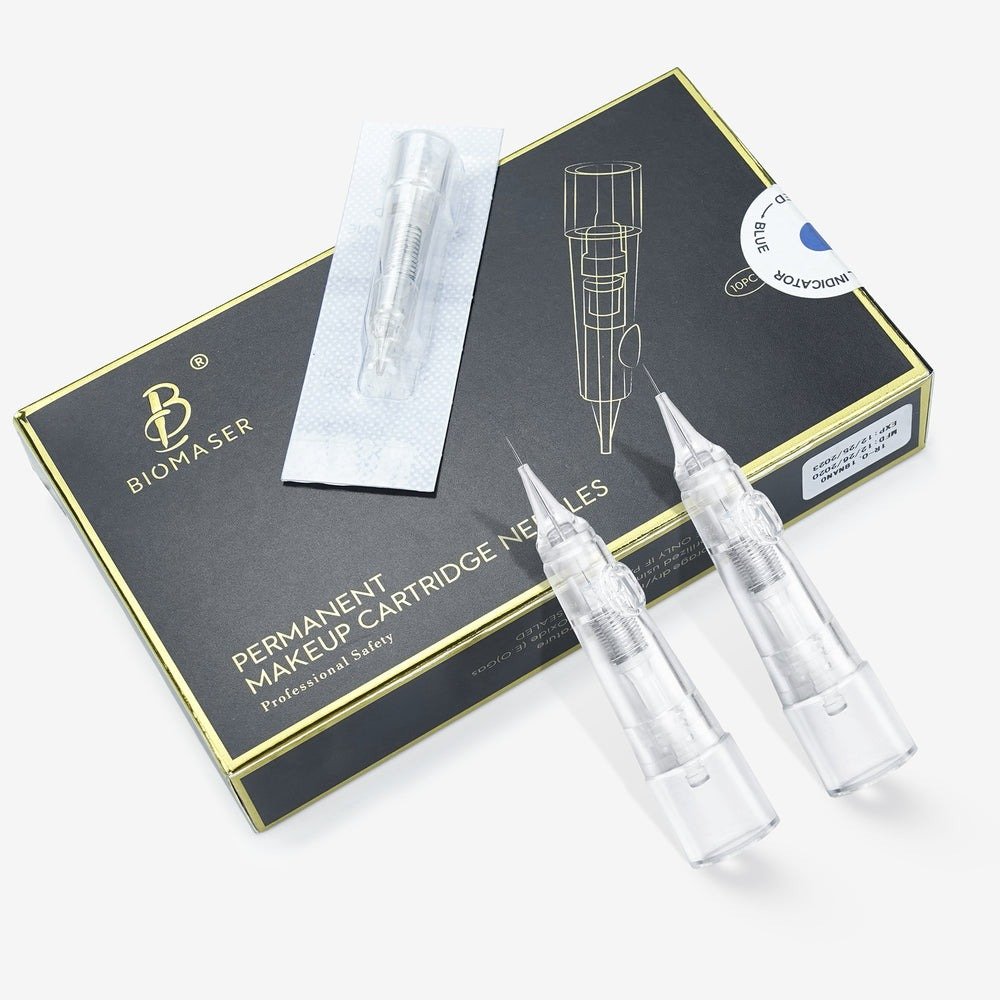
Choosing the right PMU cartridge requires practitioners to evaluate several critical factors that directly impact treatment safety and efficacy. Material safety comes first—surgical-grade stainless steel needles resist corrosion and maintain sharpness throughout the procedure, while medical-grade polycarbonate housings ensure structural integrity under high-speed oscillation. Needle taper and tip geometry also matter significantly; a poorly manufactured needle creates jagged micro-wounds that heal unevenly, whereas precision-ground tips produce clean channels that close predictably and stimulate uniform collagen deposition. Brand reliability serves as another practical filter, since established manufacturers like Biomaser invest in rigorous batch testing and maintain traceable production records that protect practitioners in the event of adverse reactions.
Understanding ISO Certification for Needle Safety and Compliance
ISO 13485 certification represents the gold standard for medical device manufacturing, and PMU cartridges falling under this framework undergo stringent quality management controls from raw material sourcing through final sterilization. Certified facilities must demonstrate validated processes for needle sharpening, assembly cleanliness, and packaging integrity—each step documented and auditable. For practitioners, selecting ISO-certified needles means reduced infection risk through guaranteed sterility, consistent needle geometry across every cartridge in a box, and legal protection should regulatory bodies audit their practice. Certification also ensures biocompatibility testing has confirmed that needle coatings or housing materials won’t trigger allergic responses in sensitive clients.
How to Verify Stable Performance in Microneedling Cartridges
Stable performance manifests in several testable ways before and during treatment. Inspect each cartridge visually under magnification to confirm needle alignment—tips should appear uniformly spaced with no bent or missing needles. Attach the cartridge to your device and run it briefly without skin contact, listening for smooth, consistent oscillation free of rattling or irregular vibration. During the procedure, a quality cartridge maintains its glide without snagging, delivers uniform pinpoint bleeding at set depths, and shows no loosening from the device grip after extended use. Practitioners who document these observations across brands quickly identify which cartridges deliver the dependable results their clients expect.
Step-by-Step Guide to Using PMU Cartridges for Effective Microneedling Treatments
Step 1: Pre-Treatment Preparation and Client Assessment
Every successful microneedling session begins well before the device touches skin. Start with a thorough client consultation—assess skin type, identify contraindications such as active acne, rosacea flares, or recent retinoid use, and document treatment goals with photographs. Cleanse the treatment area using a gentle, pH-balanced cleanser followed by an antiseptic solution to eliminate surface bacteria. Prepare your sterile workspace by laying out cartridges, gloves, gauze, and post-treatment serums on a disinfected tray. Select your cartridge configuration based on the session’s objectives: nano cartridges for superficial brightening work, 12-pin round configurations for general rejuvenation, or 36-pin flat formations for broad coverage on larger areas like the cheeks and forehead. Apply a numbing agent twenty to thirty minutes before starting if treating sensitive zones or deeper depths.
Step 2: Cartridge Handling and Needle Depth Configuration
Remove the cartridge from its sealed blister pack immediately before use—never pre-open packaging. Inspect the needle tips under adequate lighting to confirm alignment and integrity, then attach the cartridge firmly to your pen device until you hear or feel the locking mechanism engage. Set your needle depth according to the treatment zone: 0.25–0.5mm for periorbital areas and the forehead, 0.5–1.0mm for cheeks and jawline, and 1.0–1.5mm for thicker skin on the neck or areas with deep scarring. Run the device briefly at your chosen speed setting to confirm smooth oscillation before making skin contact.
Step 3: Executing the Microneedling Procedure with Precision
Apply a thin layer of hyaluronic acid serum to the treatment area to facilitate cartridge glide. Hold the device perpendicular to the skin surface and move in consistent, overlapping passes—work in horizontal, vertical, and diagonal directions across each zone to ensure uniform channel density. Maintain light, even pressure and let the microneedling cartridges do the work; pressing too hard causes unnecessary trauma and uneven results. Monitor the skin’s response continuously, looking for uniform erythema and pinpoint bleeding appropriate to the selected depth. Treat each facial zone systematically, completing one area fully before moving to the next.
Step 4: Post-Treatment Care and Monitoring for Optimal Results
Immediately after completing the procedure, apply a calming serum containing growth factors or peptides while micro-channels remain open—this window of enhanced absorption lasts approximately fifteen to twenty minutes. Follow with a hydrating barrier cream to lock in moisture and support the skin’s repair process. Instruct clients to avoid direct sun exposure, active skincare ingredients like retinol and glycolic acid, and heavy makeup for at least forty-eight hours. Schedule follow-up communication within twenty-four hours to monitor healing and address concerns. Most skin rejuvenation protocols require four to six sessions spaced three to four weeks apart, allowing complete collagen remodeling between treatments.
Best Practices for Enhancing Treatment Outcomes with PMU Cartridges
Achieving consistently superior results requires practitioners to integrate several habits into their microneedling workflow. Maintain strict hygiene protocols by using fresh gloves for each treatment zone and never reusing cartridges across sessions, regardless of how briefly they contacted skin. Pair your needling with targeted serums selected for each client’s primary concern—tranexamic acid for melasma, growth factors for aging skin, or niacinamide for enlarged pores—to maximize the transdermal delivery window. Customize needle configurations and depths based on individual skin thickness, sensitivity, and treatment history rather than applying a one-size-fits-all approach. Track client progress through standardized photography at consistent lighting and angles before each session, which helps you refine depth settings and cartridge choices over time. Finally, invest in cartridges from manufacturers who demonstrate stable performance through ISO-certified production, because even the most skilled technique cannot compensate for inconsistent needle quality. These combined practices build a reputation for reliable, visible skin rejuvenation that keeps clients returning and referring others to your practice.
Common Pitfalls to Avoid with Microneedling Cartridges
Even experienced practitioners fall into avoidable traps that undermine treatment quality. Using expired or non-ISO-certified needles introduces infection risk and inconsistent penetration, so always verify expiration dates and certification markings before opening any cartridge. Setting incorrect needle depths—too shallow for scar revision or too deep on thin periorbital skin—leads to either underwhelming results or excessive trauma. Poor aftercare guidance, such as failing to warn clients against retinol or sun exposure, can trigger post-inflammatory hyperpigmentation that erodes trust. Neglecting client feedback between sessions means missing early signs of adverse reactions or dissatisfaction. Prevent these issues by implementing pre-procedure checklists, standardizing depth protocols by facial zone, providing written aftercare instructions, and scheduling structured follow-ups that capture healing progress and inform subsequent treatment adjustments.
Mastering PMU Cartridges for Transformative Microneedling Results
PMU cartridges represent far more than disposable accessories—they are the defining variable in whether a microneedling treatment delivers transformative skin rejuvenation or falls short of client expectations. Throughout this guide, we’ve established that effective outcomes depend on three interconnected pillars: selecting cartridges manufactured under ISO-certified quality controls, verifying stable performance through hands-on inspection and procedural consistency, and executing treatments with disciplined technique from preparation through aftercare. Practitioners who internalize these principles position themselves to deliver measurable improvements in collagen density, texture refinement, and overall skin vitality that clients can see and feel. The microneedling landscape continues to evolve rapidly, with cartridge engineering advancing toward finer needle gauges, smarter configurations, and enhanced biocompatible materials that will further narrow the gap between non-invasive treatments and surgical results. Aesthetic professionals who commit to mastering their tools today—understanding the science behind each needle grouping, investing in certified quality, and refining their procedural protocols—will lead this evolution rather than chase it. Apply this guide as your operational framework, and let consistent, exceptional results speak for your practice.