Selling items on Poshmark and eBay requires more than just a good product. You need photos that grab attention and build trust with your buyers. If your images look blurry or pixelated, people will assume your items are in poor condition. High quality photos show that you are a professional seller who cares about details. Many sellers struggle with old photos or images taken on older smartphones that lack clarity. You can solve this problem by using advanced technology to improve your visual content.
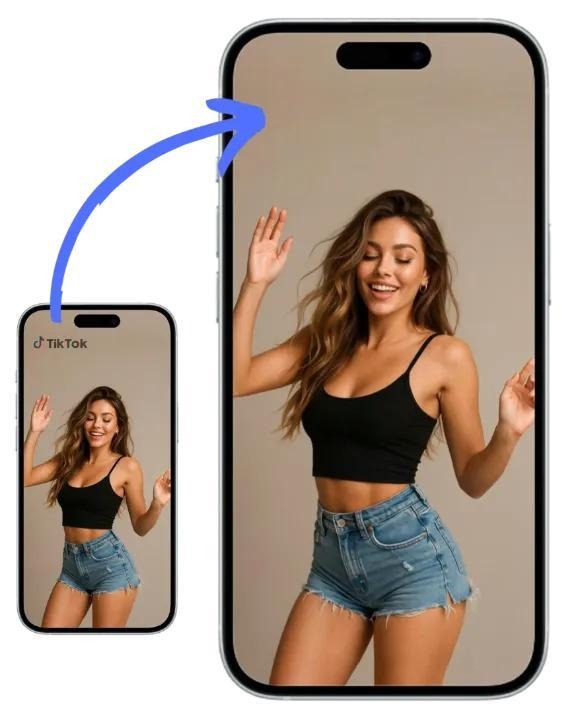
You can easily transform your blurry listing photos by using a high quality Image Upscaler to increase resolution. This tool uses artificial intelligence to study your original photo and add missing pixels. It does not just make the image larger by stretching it. Instead, it recreates the textures and edges to make the photo look like it was taken with a professional camera. This process allows you to take a small file and turn it into a massive 16K image that looks sharp even when buyers zoom in to see fabric details.
If you want to take your listings to the next level, you should also use an AI Photo Editor to fix lighting and color issues. This software helps you remove distracting backgrounds or adjust the brightness so your items pop. Most e-commerce platforms prefer clean, white backgrounds because they look more like a retail store. By combining upscaling with smart editing, you create a shopping experience that rivals big brands. This helps you sell your items faster and often at a higher price point because the perceived value is much higher.
Step by Step Guide to Upscaling Your Listing Photos
Follow these steps to turn your low resolution images into 16K masterpieces. This process is simple and does not require any graphic design experience.
Step 1: Gather Your Low Resolution Images
Start by collecting all the photos you want to improve. You might have old photos from previous listings or shots taken in a dark room. Look for images where the item is centered but the details are a bit fuzzy. It is better to start with the original file if you have it. If you only have the version you downloaded from a social media site, that will work too. Put these files into a single folder on your computer or phone so you can find them quickly.
Step 2: Choose Your AI Upscaling Settings
Once you have your files ready, open your AI tool and upload the first image. You will usually see several options for how much you want to enlarge the photo. For Poshmark and eBay, a 4x or 8x upscale is often enough, but going up to 16K ensures that every thread and button is visible. Select the option that focuses on textures or product photography. This tells the AI to prioritize sharpness and clean lines rather than smoothing everything out like it would for a portrait of a person.
Step 3: Process the Image
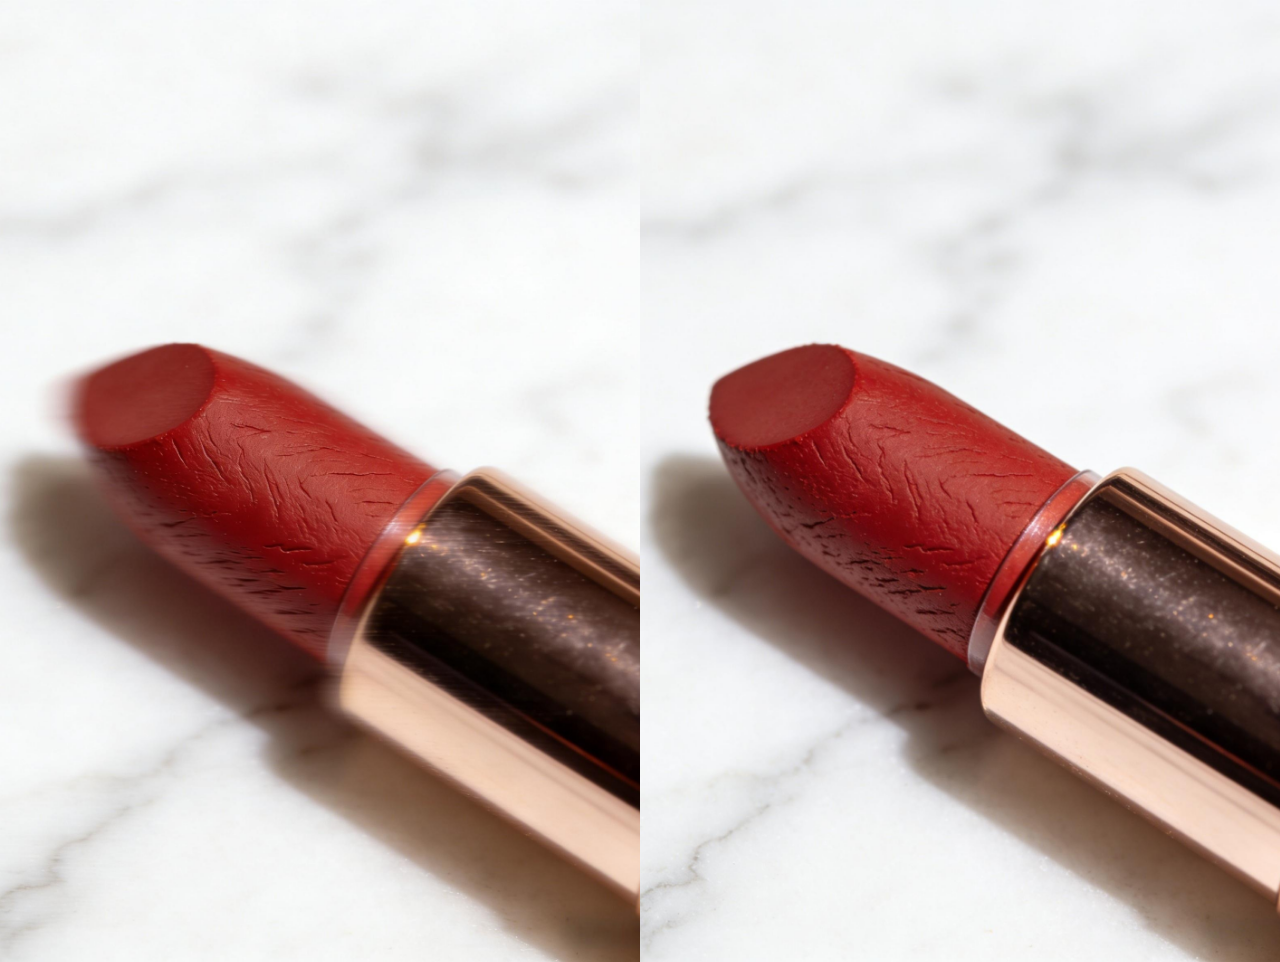
Click the start button and let the AI do the work. The software will analyze the patterns in your photo. If you are selling a knit sweater, the AI recognizes the pattern of the yarn and replicates it across the new, larger image. This takes a few seconds or a minute depending on the size of the file. You will see a preview of the before and after versions. Look closely at the edges of the item to make sure they are crisp and not distorted.
Step 4: Refine the Colors and Lighting
After upscaling, you might notice that the colors look a bit flat. Use your editing tools to boost the saturation slightly so the item looks true to life. You want the buyer to see exactly what they will get in the mail. Adjust the exposure so there are no dark shadows hiding potential flaws or features. A bright, clear photo reduces the number of questions you get from buyers and lowers the chance of a return.
Step 5: Save and Upload to Your Shop
Save your new 16K image in a format like JPG or PNG. These formats are widely accepted by eBay and Poshmark. When you upload the new file, you will notice that the platform allows buyers to zoom in much further than before. This is a huge advantage for items like jewelry, electronics, or designer handbags where authenticity and condition are everything. Your listing will now look much more professional than the competition.
Resolution Comparison for E-commerce
| Standard Resolution | Upscaled Resolution | Best Use Case |
| 720 x 720 | 2880 x 2880 | Basic mobile viewing |
| 1080 x 1080 | 4320 x 4320 | Standard desktop zoom |
| 2000 x 2000 | 8000 x 8000 | High detail inspection |
| 4000 x 4000 | 16000 x 16000 | Professional archival quality |
Tips and Best Practices for High Quality Listings
To get the best results from AI upscaling, you should follow some basic photography rules. The AI is powerful, but it works best when you give it a good foundation.
Use Natural Lighting Whenever Possible
The best photos are taken near a window during the day. Natural light shows the true color of the item and prevents the graininess that happens in low light. Even if you plan to upscale the photo later, starting with a bright image makes the AI’s job much easier. It can identify the edges of the product more clearly when there is a strong contrast between the item and the background.
Keep Your Camera Lens Clean
It sounds simple, but a fingerprint on your phone lens can create a permanent haze in your photos. AI can fix many things, but it struggles to remove a greasy blur that covers the entire frame. Wipe your lens with a soft cloth before every shoot. This ensures that the base image is as clear as possible before you even start the upscaling process.
Focus on the Details
Take close up shots of tags, zippers, and any wear and tear. Buyers appreciate honesty. If you upscale a photo of a small scratch, the buyer can see exactly how big it is. This builds a reputation for transparency. Use the AI to make these detail shots so clear that the buyer feels like they are holding the item in their hands.
Maintain a Consistent Style
Try to use the same background and lighting for all your listings. This makes your shop look like a cohesive brand. When you upscale your photos, use the same settings for every image. This ensures that the sharpness and grain levels match across your entire inventory. A consistent look makes your shop appear more trustworthy to frequent buyers.
Common Mistakes to Avoid
Many sellers make simple errors when they first start using AI to improve their photos. Avoiding these mistakes will save you time and help you produce better results.
Over Sharpening the Image
It is tempting to turn the sharpness all the way up, but this can make your photos look fake. If the edges look like they are glowing or if the texture looks like plastic, you have gone too far. The goal is to make the photo look natural. Use a light touch when adjusting the settings in your AI tool. You want the item to look better, not like a digital painting.
Ignoring the Aspect Ratio
Poshmark uses square photos. If you upscale a rectangular photo and then crop it, you might lose important parts of the image. Always try to take your photos in a square format or leave plenty of space around the item. This gives you the flexibility to crop and resize after the upscaling process without cutting off the corners of your product.
Using Low Quality Originals
While AI can do amazing things, it cannot create details out of thin air if the original photo is a complete blur. If a photo is extremely shaky or out of focus, it is better to retake it than to try and save it with AI. Use upscaling to enhance a decent photo, not to rescue a terrible one. This ensures the final 16K result actually looks like a real photograph.
Forgetting to Check File Sizes
A 16K image can result in a very large file size. Some e-commerce platforms have limits on how big a file can be. If your file is too large to upload, you may need to compress it slightly. Most AI tools allow you to choose the compression level. You want a balance between a high resolution and a file size that the website can handle quickly.
Conclusion
Improving your Poshmark and eBay photos with AI is a smart move for any serious seller. It allows you to compete with professional retailers without spending thousands of dollars on camera equipment. By following a simple workflow of upscaling and editing, you can turn basic snapshots into high resolution assets. This leads to more clicks, more sales, and happier customers. Start by testing a few of your older listings to see the difference that 16K clarity can make. You will likely find that the small amount of extra effort pays off quickly in your sales numbers. Clearer photos lead to better communication and a more successful online business.