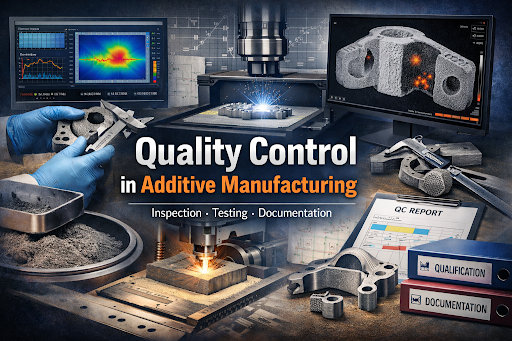
A lot of parts fail for a boring reason: nobody can prove they were made the same way twice. That is why Additive Manufacturing needs quality control that starts before the first layer and keeps going after the part is done.
When people only check the final product, they miss the main reason for its defects. When building layer-by-layer, a small change in heat, feedstock, or setup can result in pores, warping, or weak spots inside the material that are not visible from the outside. You can still ship the part, but you are guessing.
In this guide, you’ll see what quality control looks like across the full workflow. You’ll also see how qualification, documentation, and inspection fit together so results hold up under review.
Why Quality Is Challenging in Additive Manufacturing
Quality is hard in AM because the process is sensitive, fast, and layered, so small changes can create big internal and dimensional problems.
Additive Manufacturing Quality Shifts
First, the risk shifts from the wrong final shape to the wrong internal structure. Layer steps can trap pores, create lack‑of‑fusion zones, or leave stress that later bends the part. These issues may not show up on the surface, especially with complex internal channels or lattice features.
Why Variability Shows Up Across Builds
Variability shows up because many inputs drift at once. Heat flow changes with geometry, layer time, and scan order. Feedstock condition changes with handling and reuse. Sensors, optics, and motion systems can drift, too. The result is that two builds with the same file may still differ in density, distortion, or surface finish. This is where statistical process control helps: it turns variation into signals you can act on, instead of surprises you explain after a failure. The practical goal is repeatability, not perfection on one hero build.
Priority Defects to Target in Your QC Plan
Start with defects that change strength, fatigue life, or fit, then pick inspection methods that can actually detect them.
Internal Flaws That Shorten Part Life
In practice, internal defects are the first priority when parts see load, pressure, or vibration. Pores and lack‑of‑fusion flaws act as stress risers. Under cycles, they can speed crack start and growth. The tricky part is detection confidence. Research on XCT shows that detection and sizing can depend on defect shape, and irregular defects can be harder to capture well at lower scan quality. That means your QC plan should define what size and type of defect must be found, and what scan settings make that realistic.
Surface And Geometry Issues That Block Fit
Meanwhile, many parts fail before they ever see a load because they do not fit. Warping, support scars, stair‑step surfaces, and out‑of‑round holes can break the assembly. These issues are often tied to thermal history and post steps like support removal, heat treat, or machining. QC should treat as‑built and as‑finished as two different states with two different risks. If you only check at the end, you lose the chance to learn which step caused the drift, so the same drift repeats next week.
Pre-Build Controls and Preparation
Pre‑build control is where you prevent the most scrap, because you stop bad inputs from entering the process.
Feedstock Handling And Machine Readiness
Often, basic readiness is what separates stable output from chaos. Feedstock needs clean storage, clear labeling, and controlled reuse rules so you do not mix lots or degrade material without noticing. The machine needs verified calibration and a known baseline condition.
Job Setup Checks That Prevent Bad Builds
Then come the job‑level checks that stop obvious failure paths. You want the right revision of the build file, the right orientation and supports, and the right post plan tied to the part’s function. You also want clear acceptance criteria before you print.
Pre-Build Controls That Prevent Scrap
Monitoring reduces scrap by catching drift early, so you can stop, adjust, or quarantine parts before you spend more time and money.
What Signals Matter During Printing
Typically, useful signals tie back to energy input and melt behavior. Camera views, photodiodes, acoustic signals, and thermal data can reveal instability, spatter, track issues, and layer anomalies. Modern research trends push toward multi‑sensor fusion because no single sensor captures the whole process well.
When Monitoring Can Support Closed-Loop Control
Sometimes, monitoring moves from watching to controlling. Closed‑loop approaches use live signals to adjust settings like power or speed to hold a stable melt signature. Reviews describe physics‑informed control, ML‑assisted control, and hybrid approaches. The QC takeaway is simple: closed‑loop control can raise consistency, but only when sensors, models, and response time match the process speed.
Mechanical Testing and Coupon Validation
You need mechanical testing when properties drive safety or life, or when a customer or standard requires proof beyond inspection.
What Coupons Prove And What They Miss
Generally, coupons prove what the process can produce under defined conditions. They support allowables, acceptance, and comparisons across changes. But coupons can miss part‑specific risk. A coupon may cool differently from a thick section, or it may not represent a high‑stress notch. This is why part qualification ties test strategy to real geometry and real risk. The goal is not to pass coupons. The goal is to prove the part family will behave as expected in service, with defects and variation under control.
How Post-Processing Changes Results
Still, post steps often decide the final performance. Heat treatment, hot isostatic pressing, machining, and surface finishing can change microstructure, residual stress, and fatigue behavior. So QC must treat post‑processing as part of the manufacturing process, not a separate cleanup step. This is also why test records matter: if you do not tie results to post conditions, you cannot learn from failures or defend your process after a change.
Qualification and Certification in Additive Manufacturing
Qualification proves you can repeat a process under controls; certification proves a design or part is acceptable for use in a defined context.
Facility And Machine Qualification Basics
Facility and machine qualification focus on whether the whole system is ready for repeatable production. Textbook framing breaks it into levels like facility qualification and machine qualification, with staged approaches that verify installation and operation, then prove stable output. This is not paperwork for its own sake. It is a way to avoid re‑learning the same lessons every time a machine is moved, repaired, or tuned. It also creates a shared baseline so a customer can trust your results.
Part Qualification And Acceptance Logic
Part qualification is where you connect process capability to a real part requirement. Here is the one sentence many teams skip: Additive Manufacturing qualification is easiest when you define what good means before you print. NIST notes qualification can be extremely time‑ and cost‑intensive with extensive empirical testing, and small changes can trigger re‑qualification. That reality is why QC planning is a business decision, not only a technical one.
What Records Prove Traceability And Compliance?
Records prove what happened, with what inputs, under what revision, and who approved the release.
What To Log For Each Build
At minimum, you want build ID, file revision, machine ID, operator, feedstock lot, key settings, monitoring summaries, post steps, and inspection results tied to acceptance criteria. This is traceability in practical form. It lets you answer basic questions fast: Which other parts share this powder lot? Was this made before or after a calibration event? Did this run deviate from baseline? Without logs, you can only guess, and guessing is not an audit strategy.
Keeping Revisions And Changes Under Control
Change control is where QC plans usually break. A new scan strategy, a new powder supplier, a firmware update, or a different heat treat cycle can all shift results. Standards around critical applications emphasize production control, and real shops feel that pressure when customers demand repeatable output. The fix is boring but effective: define which changes force review, which force re‑validation, and which only require documentation. If you do not define it, every change becomes a debate.
Scaling Quality Control from Prototype to Production
Scaling QC means reducing guesswork: lock inputs, tighten controls, and make release decisions consistent across people and sites.
Control Plans That Survive Volume
As volume grows, you cannot rely on one expert watching every build. You need written control plans, trained roles, and clear sampling and inspection rules that match risk. This is where a production partner can help, because platform workflows can standardize quoting, specs, and inspection before shipping. If you are moving toward higher volume builds, a page like Xmake’s Mass Production Simplified is a useful mental model: it frames repeatability and on spec delivery as the core goal, not just speed.
Five-Minute Quick-Scan For Release Decisions
Finally, use a fast release scan so decisions do not stall. Five‑Minute Quick‑Scan: timeline (build date, post date, ship date); constraints (tolerances, internal features, critical zones); cost (extra inspection cost vs remake); options (rework, reprint, scrap, downgrade use); next step (who signs release, where records live). This does not replace deep QC. It prevents last‑minute chaos by making sure every part has the same short decision path.
Quality Control Support From Xmake
A good manufacturing partner speeds up QC by agreeing on what good means before the build, then shipping parts with the right inspection already done.
How To Request The Right Inspection
Ask for an inspection that matches the part’s job, not a generic looks OK check. If fit matters, call out your critical datums and tolerance zones. If internal channels matter, request a volumetric check and say what features must be verified. Xmake’s custom 3D printing service (tolerance guidance + quality assurance) is a solid starting point to align what gets inspected and what will be reported.
Evidence Pack You Should Ask To Receive
Request a simple Evidence Pack: order ID and revision, photos (as-built and finished), key measurements tied to drawing zones, post-process notes, build and inspection timestamps, and a brief nonconformance note if anything was reworked. This makes acceptance faster and keeps defect reviews focused on root cause, not blame.
Closing Lines
Quality control is the key that connects our technology, which allows printing the part that we can rely on the printed part. The most effective way to get quality results is to think of QC as a cycle: start by controlling your inputs before the build, monitor the key signals during the printing process, and then check both the geometry and the internal structure after the build. Making the loop of qualification and documentation will make your process stable even when the staff, the machine, or the customer changes.
If you take one idea forward, make it this: decide what good means before you print, and make your inspection prove that definition. That is how you cut scrap, shorten debug time, and reduce field risk. When you need extra speed or added structure, you can also use a manufacturing partner’s workflow and inspection options to keep the process consistent. For more on services and production paths, explore what’s available on xmake.
FAQ
What Is The Main Goal Of QC In AM?
The goal is repeatable performance. QC makes sure the process stays inside known limits, and the part meets the requirements that matter, not just the ones that are easy to measure.
Can CT Replace All Other Inspections?
No. CT is powerful for internal features, but it has resolution and sizing limits that depend on scan settings and defect geometry. External metrology is still needed for fit‑critical geometry.
Why Does Documentation Matter So Much?
Documentation is how you prove what happened and learn from it. Without records, you cannot trace issues to lots, revisions, or post steps, and you cannot defend release decisions.


