You do not need to be a designer to notice when a photo looks weak. Maybe it is blurry, too small, badly compressed, or simply not sharp enough for the way you want to use it. This happens all the time with old phone photos, downloaded images, screenshots, profile pictures, product photos, and social media assets. The image may still be useful, but it does not look good enough to publish, print, or share proudly.
That is where an HD photo converter becomes useful. Instead of opening complicated editing software, you can often convert photos to HD online in a few quick steps. For everyday users, that makes a big difference. You do not need layers, masks, or retouching skills. You just need a photo that is close enough to save and a tool that can improve clarity without making the result look fake.
So what does an HD photo converter actually do? In simple terms, it increases resolution and tries to improve visible detail at the same time. Older image tools usually just stretched a picture. That made the file larger, but it also made softness and pixelation more obvious. Newer AI-based tools work differently. They examine the structure of the image and try to rebuild cleaner edges, reduce noise, and make the final picture look sharper and more usable.
The easiest way to use one is to start with a realistic goal. Ask yourself where the photo will end up. Do you need it for social media? A website banner? A marketplace listing? A print? Your answer matters because not every image needs the same level of enhancement. A picture for Instagram may only need a light improvement. A product image for an online store might need more clarity and cleaner edges. A print file will usually need the most resolution.
Step one is choosing the best source file you have. This is important. AI can improve a lot, but it works better when the starting image is not heavily damaged. If you have multiple versions of the same picture, pick the original instead of the one downloaded from a social platform. Social media compression removes detail, and that missing detail is harder to recover later.
Step two is uploading the image and checking the available scaling or enhancement options. In most cases, moderate improvement works best. Many people assume more is always better, but that is not true. Pushing a tiny image too far can make it look over-processed. Faces may become too smooth. Edges may get halos. Textures may start to look painted. A natural result is usually better than the sharpest possible result.
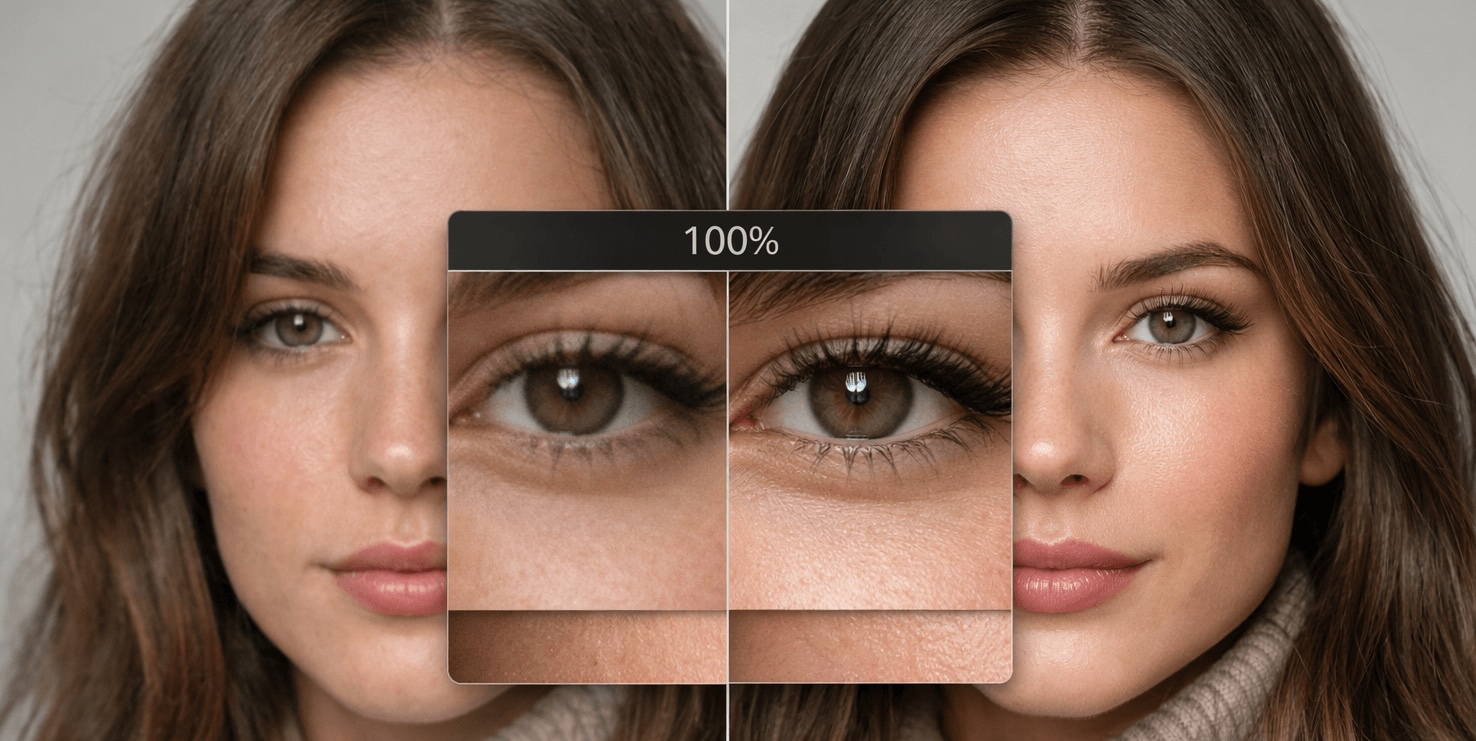
Step three is reviewing the output carefully before you download it. This is the part many beginners skip. Do not judge the image only from far away. Zoom in a little and inspect the areas that matter most. On portraits, check the eyes, hairline, and skin texture. On product photos, look at corners, labels, seams, and surface detail. On screenshots, check whether the small text is actually clearer. If the image looks cleaner but still believable, the enhancement is working.
Another smart habit is to compare before and after for the intended use case. A file might still look imperfect at full zoom but work perfectly on a product page, social post, or blog banner. The goal is not perfection under extreme inspection. The goal is to get an image that looks strong and professional where people will actually see it.
One reason these tools are becoming popular is that they help with many common situations. Old family photos can look less faded and soft. E-commerce images can become more presentable. Thumbnails can feel cleaner. Real estate photos can gain clarity. Even screenshots and scanned documents can sometimes become easier to read. That versatility is why more people are using an HD photo converter as a first step instead of jumping straight into full editing.
There are, however, a few mistakes worth avoiding. The first is over-upscaling. If the original file is extremely poor, going too far may create a plastic or artificial look. The second is using the wrong image as your source. Always start with the cleanest original available. The third is expecting AI to fix every problem at once. If a photo is badly framed, poorly lit, and severely blurred, enhancement may help, but it will not turn it into a studio image.
It also helps to understand where a converter fits in the bigger workflow. For many users, it is the fastest way to rescue a file before deciding whether more editing is needed. If you want a deeper look at how enlargement and enhancement work together, an image upscaling guide is useful because it explains why some images respond better than others and when 2x or 4x improvements make sense.
The biggest advantage of today’s HD photo tools is simplicity. You no longer need advanced software just to make a low-resolution image more usable. For bloggers, small business owners, students, creators, and everyday users, that is a real improvement. A quick enhancement pass can save an otherwise wasted image and make it ready for the place it needs to go.
If you deal with blurry, pixelated, or underwhelming visuals on a regular basis, an HD photo converter is one of the easiest tools to add to your workflow. Used with realistic expectations, it can turn weak source files into cleaner, sharper, more presentable images in just a few minutes.